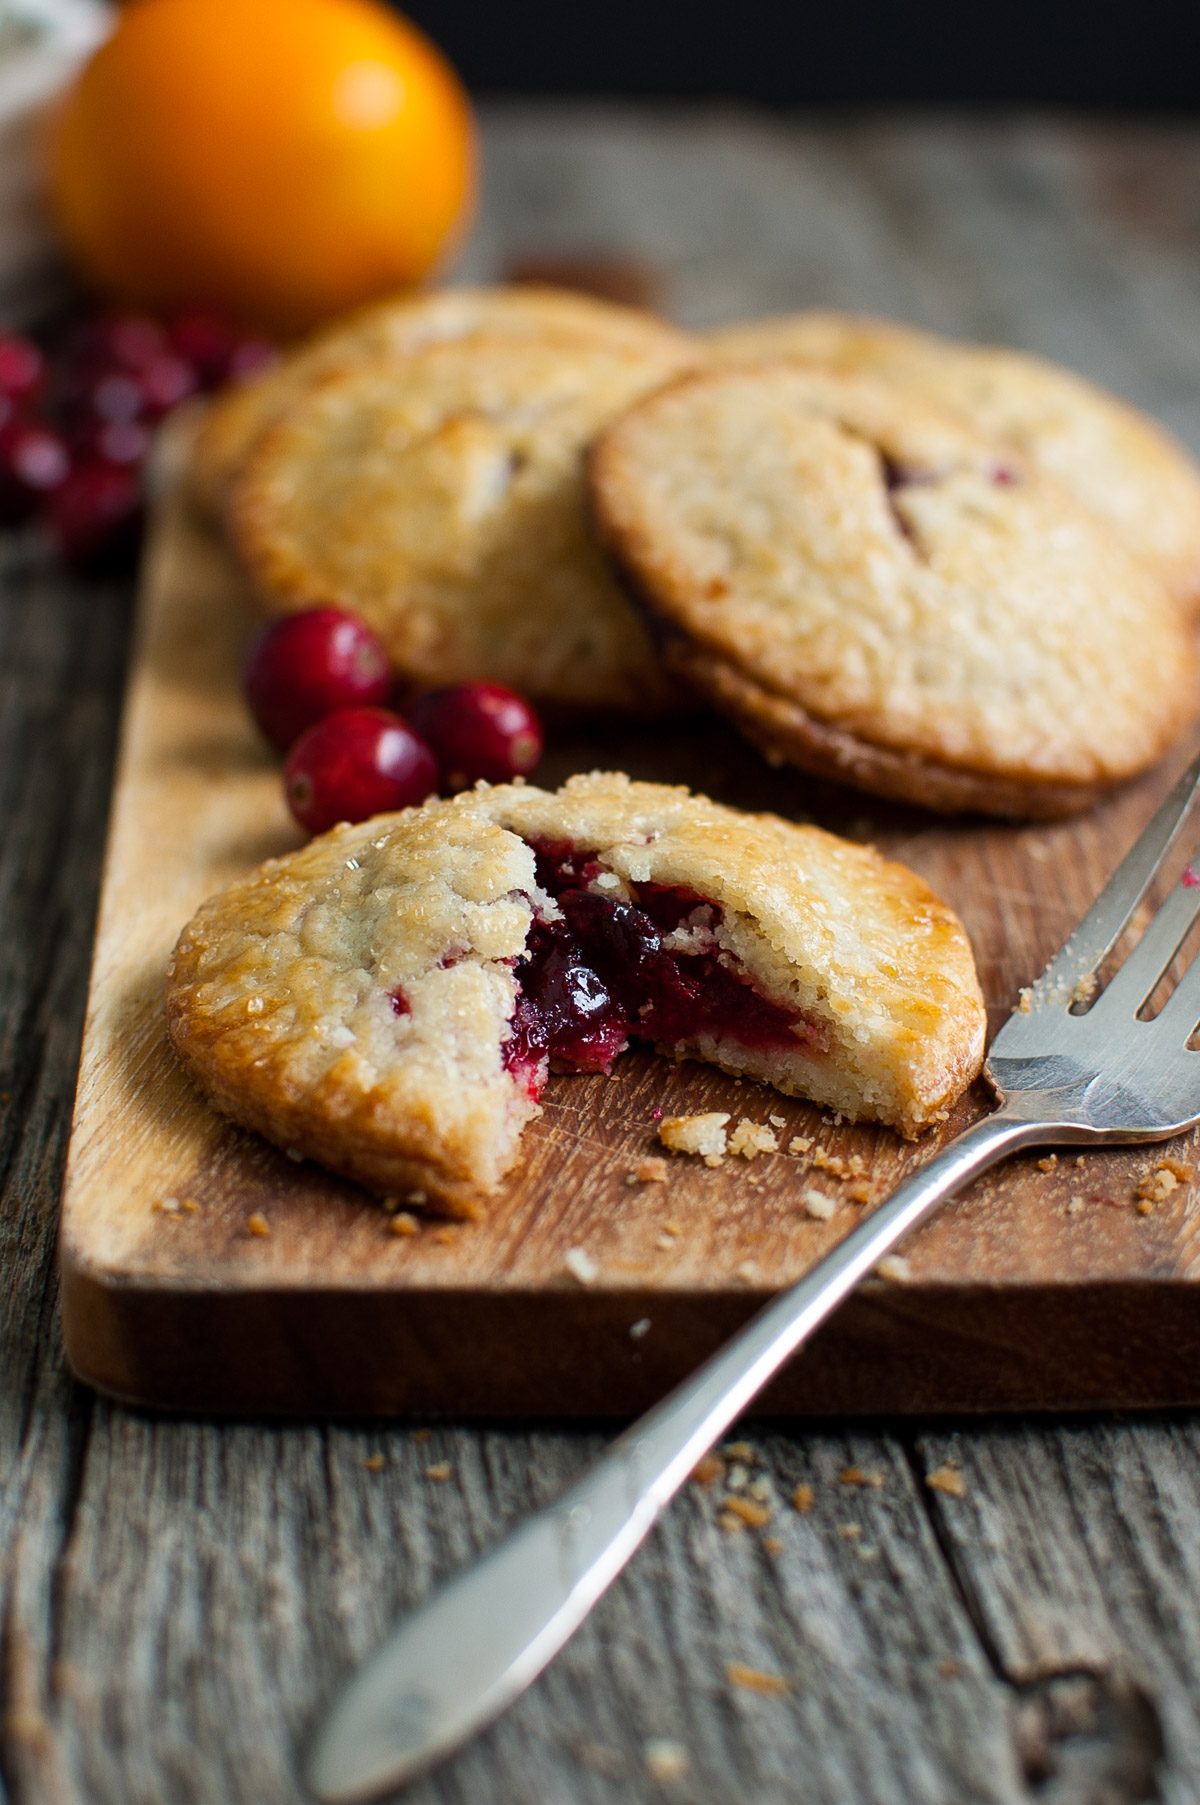
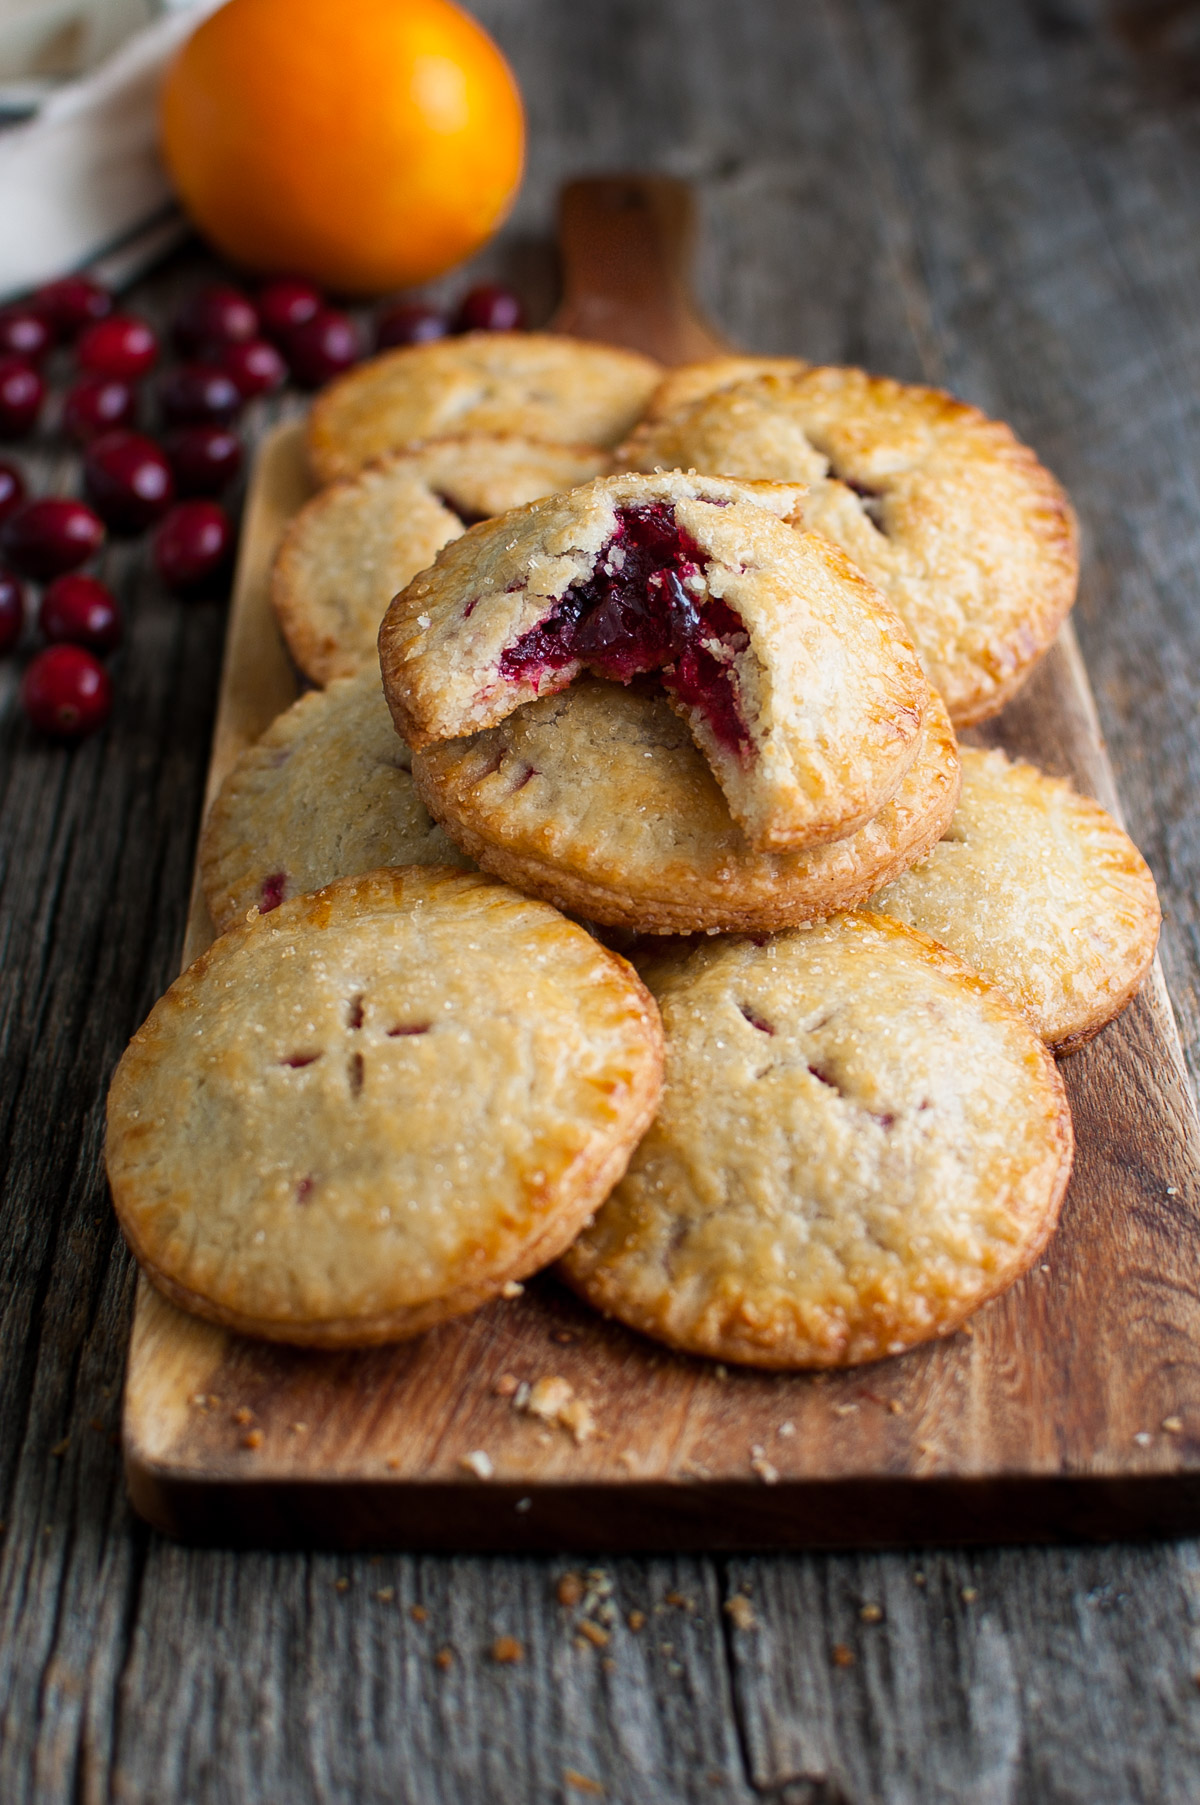
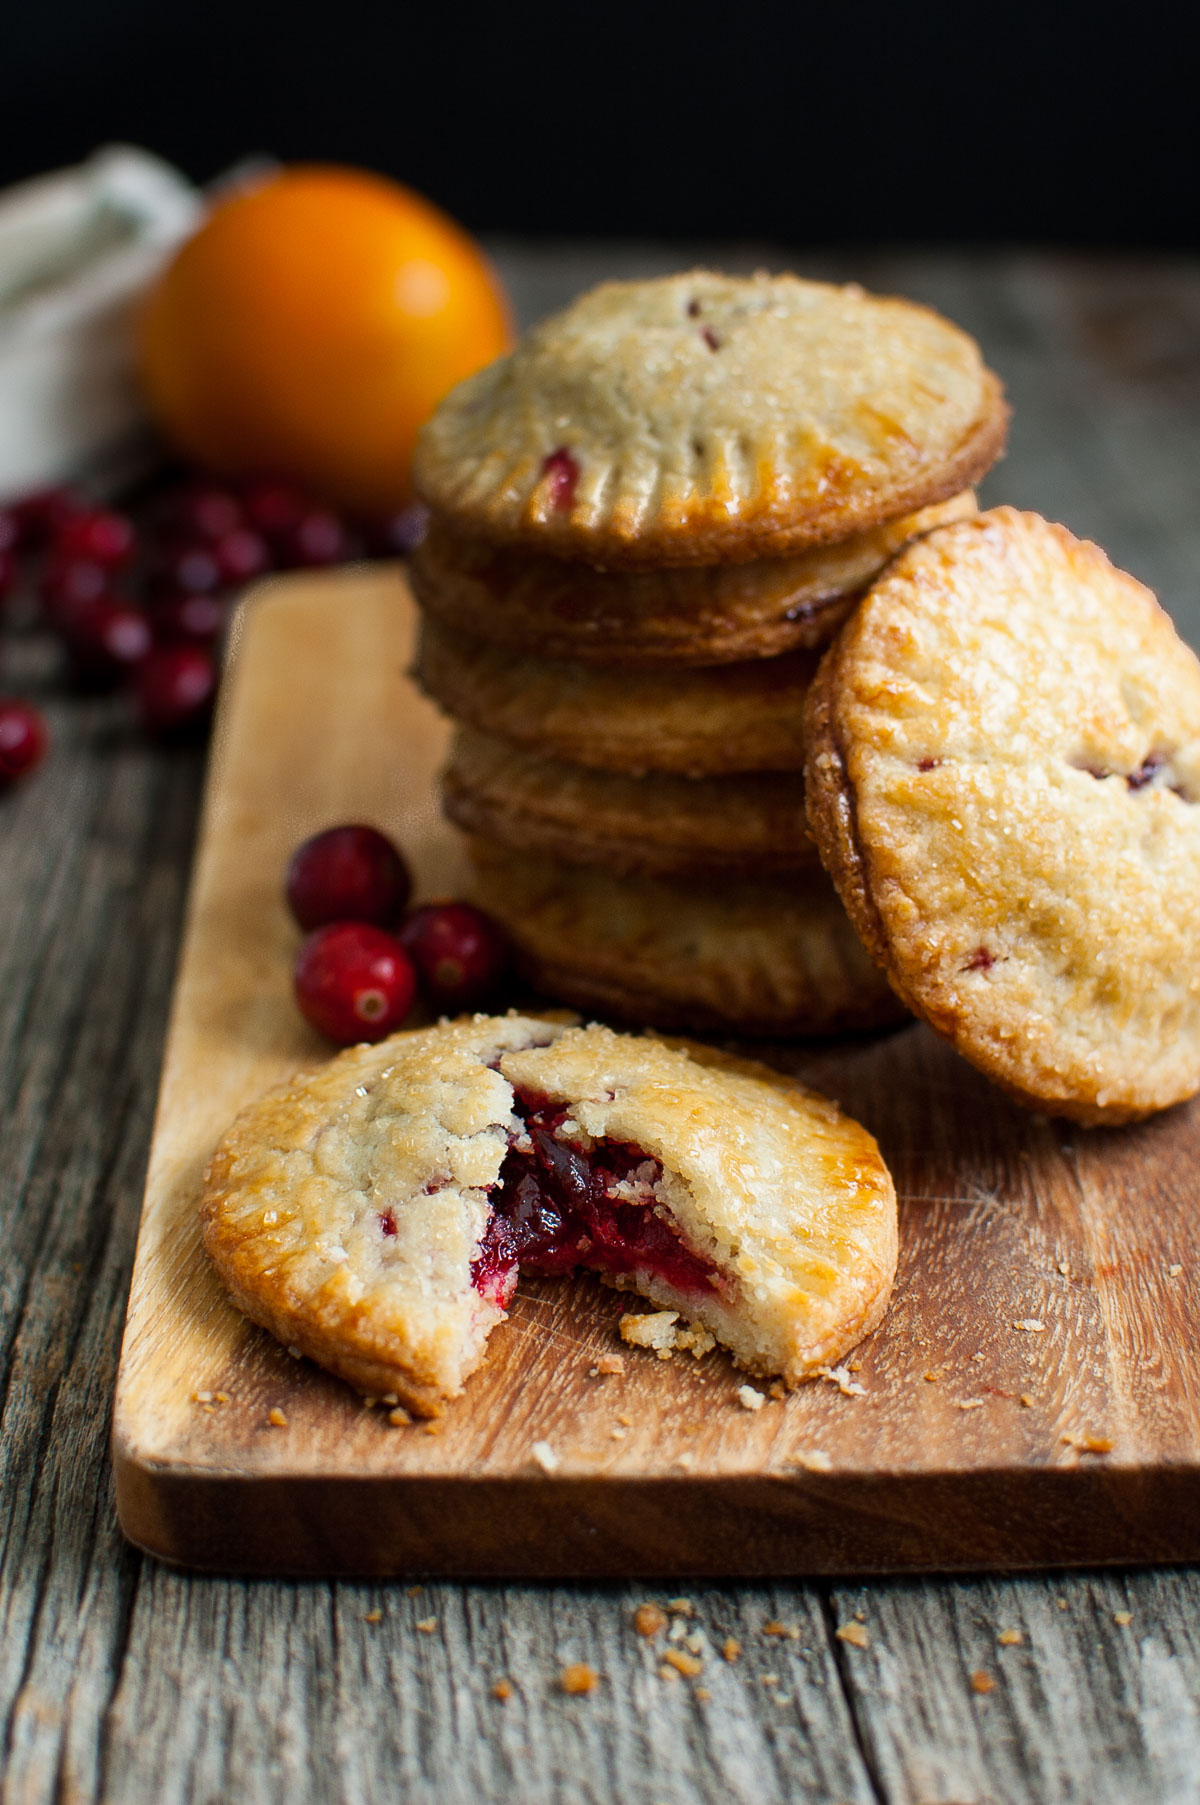
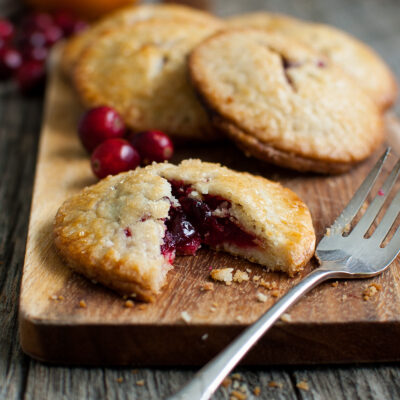
These cranberry orange hand pies have a sweet-tart cranberry orange filling inside and the most tender pie crust outside.
- Prep Time:
3 hrs - Cook Time:
20 mins - Total Time:
3 hrs 20 mins
If you look through my dessert posts, you’ll notice I have a thing for tartlets. See strawberry vanilla tartlets, french apple tartlets, and chocolate raspberry tartlets as evidence. So, it should come as no surprise that I also love hand pies.
Hand pies have all the yumminess and cuteness of tartlets but are wrapped in a convenient, grab-and-go, tender, flakey crust package. But it can’t be just any crust. No, it has to be a crust worthy of being highlighted. After all, there is more crust than filling in a hand pie so the crust has to be really, really good. And this crust delivers.
Tips for working with the pie dough
This crust contains more sugar than a standard pie crust which makes it super tender and tasty. It also makes it more difficult to work with. But it’s worth it.
Working with the dough at the right temperature will help tremendously. The dough needs to be chilled to start but then it has to sit at room temperature for a few minutes so that it can be rolled out without cracking. Once it gets too soft to work with, it needs to be refrigerated again.
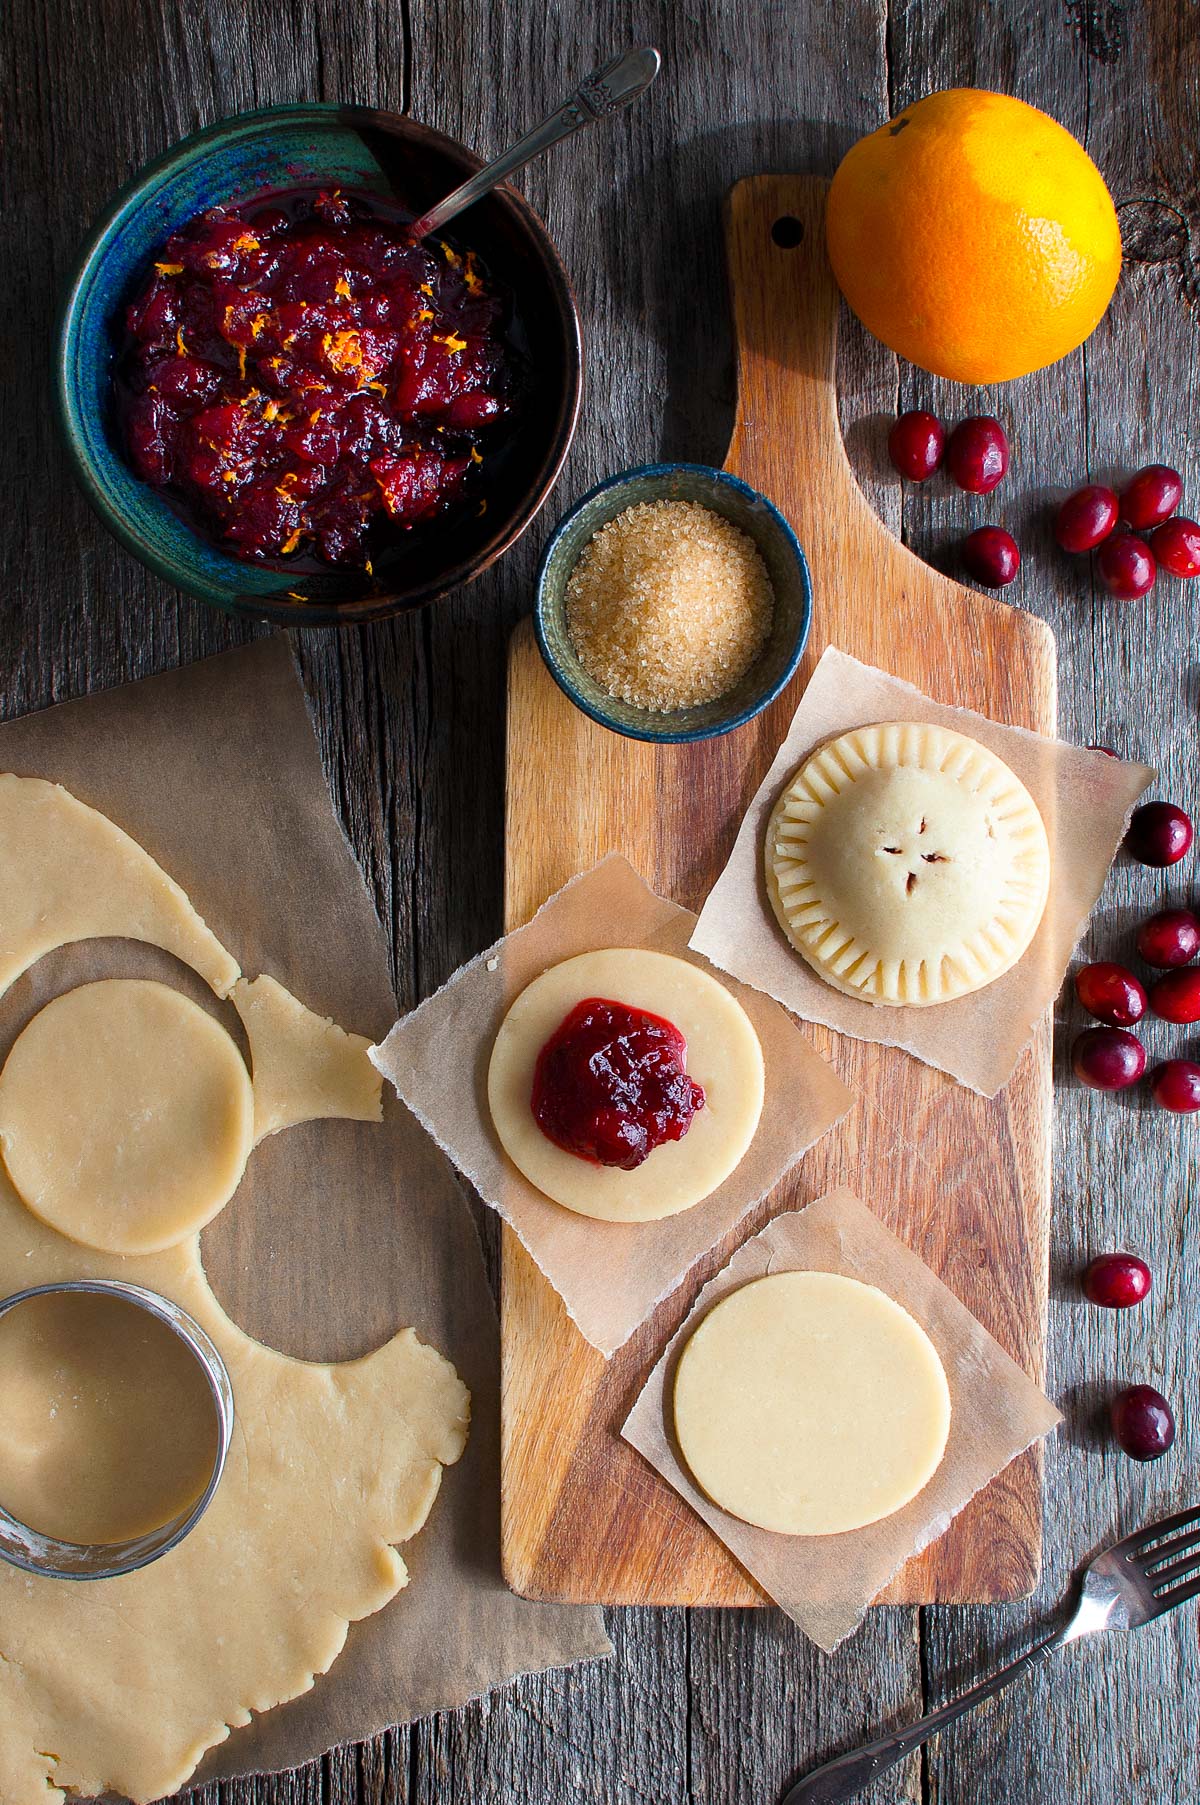
So be patient and make sure your work surface and rolling pin are well floured. I also recommend using an offset spatula to pick up the cut rounds of dough.
Of course, a hand pie without filling would just be a soft cookie so let’s not forget about the cranberry orange filling. Cranberries are too tart on their own but when properly sweetened and cooked with a hint of orange and vanilla, they become divine.
This filling is the perfect balance of sweet and tart and is almost good enough to eat with a spoon. I adjusted the original recipe to reduce the amount of filling since I always seemed to have so much extra filling left over. Now, the crust and filling work out better once the pies are assembled.
Cranberry Orange Hand Pies
- Prep Time: 3 hours
- Cook Time: 20 minutes
- Total Time: 3 hours 20 minutes
- Yield: 20-24 hand pies
- Category: Dessert
- Method: Baking
- Cuisine: American
Description
These cranberry orange hand pies have a sweet-tart cranberry orange filling inside and the most tender pie crust outside.
Ingredients
For the dough
- 3 2/3 cups unbleached all-purpose flour
- 1 cup sugar
- 1 1/2 teaspoons kosher salt
- 1 1/2 cups (3 sticks) plus 3 tablespoons unsalted butter, cut into 1/2-inch cubes, well-chilled
- 4 to 6 tablespoons ice water
For the filling
- 12 ounces fresh (or frozen and thawed) cranberries (about 3 cups)
- 1 cup plus 2 tablespoons granulated sugar
- 1 teaspoon finely grated orange zest
- 2 tablespoon fresh orange juice
- 1/4 teaspoon instant tapioca (not starch)
- 1/2 vanilla bean, split lengthwise (see Note 1)
For assembly
- 1 large egg, beaten to blend
- Raw sugar for sprinkling on top
Instructions
For the dough
- Mix dry ingredients and butter. Pulse flour, sugar, and salt in a food processor to combine (see Note 2). Add butter; pulse until mixture resembles coarse crumbs and no big pieces of butter remain.
- Add water. Drizzle 4 tablespoons ice water evenly over the mixture and pulse in processor until incorporated. Squeeze a small handful of dough together. If it doesn’t hold together, add more ice water, ½ tablespoon at a time, pulsing until just incorporated, then test again. You may not need all the water.
- Chill dough. Gather dough together and divide dough in half. Form each half into a ball then flatten into a ½-inch thick disk. Wrap dough in plastic and chill for at least 2 hours.
For the filling
- Make filling. Combine cranberries, sugar, orange zest, orange juice, and tapioca in a medium saucepan. Scrape in seeds from vanilla bean; add bean. Cook cranberry mixture over medium heat until mixture comes to a simmer and begins to thicken and about half the cranberries have burst, about 6 minutes. Let cool completely (see Note 3). Discard vanilla bean pod.
For assembly
- Roll and cut dough. Working with 1 disk at a time, roll out dough on a well floured surface until very thin, about 1/8 to 1/16 inch thick. If the dough is too firm to roll out after refrigerating, allow it to sit at room temperature for 5 minutes before rolling it out. Using a 3-inch diameter cookie cutter, cut out as many circles as possible (see Note 4). Store the cut rounds in the refrigerator on a baking sheet or board while rolling and cutting the second ball of dough. You can layer the rounds between sheets of parchment paper, if necessary. You should end up with 40-48 cut rounds depending on how thin/thick you roll out your dough. Be sure to cut an even number of rounds. You may also need to gather the scraps of dough and re-roll to get enough cut rounds. If the dough gets too soft to work with, put it back in the refrigerator or freezer until it firms up again.
- Prep oven and pans. When ready to bake the pies, heat oven to 425 degrees F and line 2 baking sheets with parchment paper or silicone liner.
- Assemble pies. Place half the cut rounds of dough on the two baking sheets. Brush edges of the circles with beaten egg. Place 1 heaping tablespoon of filling in center of each egg-washed circle. Top with remaining rounds of dough and gently press the edges down to form pies. Using a fork, crimp 1/4-inch around edges to fully seal. With the tip of a small paring knife, cut a small X in the center of each pie. Brush tops of pies with beaten egg and sprinkle generously with raw sugar.
- Bake. Bake pies until crust is golden brown and filling bubbles out of Xs, 17-20 minutes. Let cool on baking sheet for 5 minutes; transfer to a wire rack and let cool completely.
Notes
- In place of the half vanilla bean, you can use ½ tablespoon vanilla bean paste. Once we discovered vanilla bean paste, we found it a much more economical way to enjoy the benefits of vanilla beans. It is available at restaurant supply stores and on Amazon.com.
- For the dough, you will need a food processor that has at least an 11-cup capacity to blend the butter and flour mixture together. If your food processor is not large enough, you can combine the butter and flour by hand or use a standing mixer.
- To quickly cool the filling, first prepare an ice-bath. Put the saucepan in the ice bath being careful not to get any water into the cranberry filling. Allow the saucepan to sit in the ice bath until mixture is cool, stirring occasionally.
- If you happen to have a set of graduated round cookie cutters, you can cut half the circles using a 3-inch diameter cutter and cut the other half using a 3 1/2-inch cutter. Use the smaller rounds for the bottoms and the larger ones for the tops. Having slightly larger tops makes it easier to fit the top piece of dough over the filling without squeezing out the filling.
- Dough can be made 2 days ahead. Cranberry filling can be made 5 days ahead. Keep everything covered and chilled until ready to use.
- Assembled pies can be made 2 hours ahead. Cover; keep chilled.
- Recipe adapted from Bon Appétit, Nov 2012.
Originally published .

Michelle | The Secret Ingredient Is says
Festive and seasonal – these look so good! Great idea for a Thanksgiving dessert!
Taming of the Spoon says
Thanks, Michelle! I’m going to have to whip up another batch of these soon. They are so good.
Rosie says
That pastry looks so good! A nice alternative to mince pies 🙂
Taming of the Spoon says
Thanks! I hope you get a chance to tries these. The crust really does taste as good as it looks.